Digital bottomtimer - DIY battery exchange
The information on this site is for personal use only and is exclusively performed at your own risk without liability of this site, contributors, associates, and/or site operator. This information is not allowed for use in any commercial form or in any other way.
For a successful DIY battery change in an Aladin dive computer, you will need to have a solid working experience with soldering/desoldering and a general mechanical proficiency to access the battery. 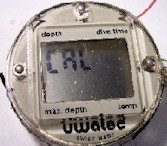 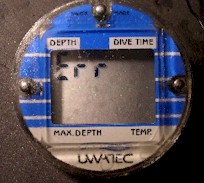   
| This bottomtimer is selling by various mark... Depth gauge is manufactured like one-shot equipment without chances of battery exchange. Manufacturer mention lifetime battery about 10 years. It's necessary to change battery erlier, before original battery go down !!!After that, settings in processor are lost, and I don't know any way, how to recall this settings after the new battery is connect. CAL or ERR is displayed in this case. | 
| | | 
When liquid reliably run out, you can separate both part the box. Ideally it can be do on the lathe with thin knife. >>>>>>>>> 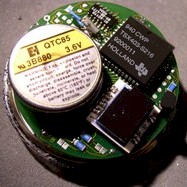
|
If you decide to save your depth gauge, you will have to cut and open the case and battery immediately replace, or at least connect back-up battery to save settings in processor.
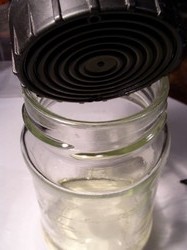
Equipment is close into two-piece box, which is after built-in electronics glued together. In bottom is hole enabling to fill inside oily liquid. This hole is sealed by small plug.
Before incident to disassembly it's necessary let out oil, by whitch is depth gauge filled. At first, push in the rubber plug carefully in, after that by light squeezing elastic bottom of box the oil can be drain out... . |
There is some variants of this depth gauge. Old models has 3,6V lithium battery 3B880 QTC85 newer models has only 3V lithium battery CR2477 .
| | | Battery exchange is necessary to do alive (under voltage)! For voltage backup, the CR2032 battery suffice for both models (3V or 3,6V). Beware of short circuit !! Beware of short circuit !! At first, connect the backup battery BT2 as shown at the pictures in right... Then carefully disassembly battery from board - repeatedly heat battery pins by soldering iron. The board can be protected by mica splitting, when soldering uder display.

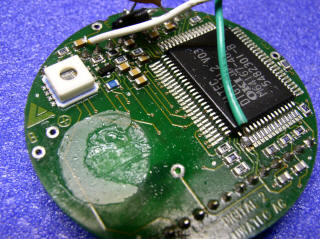
Before follow-up seal it is necessary both parts of box properly degrease (Technosol), for seal the UHU fast epoxy glue come right.. |
When you do any short circuit, ERR or CAL is displayed. There is no known way to repair it...
| | Datasheet of new chip Datasheet of old chip |
|

